An old textbook on Satellite Meteorology inspired me to publish this article, How to Convert Raster to ASCII in ArcGIS Pro. In this article we will learn How to Convert Raster to ASCII in ArcGIS Pro. In this step-by-step tutorial, you learn to create a ASCII world map along with some information related to the history of ASCII Code.
History of ASCII
American Standard Code for Information interchange abbreviates to ASCII. It is standard to encode characters by assigning unique numerical values to special symbols, letters and numbers.
Examples:
ASCII code for the letter “A” is 65
ASCII code for the letter “B” is 66
ASCII code for the dollar sign is 36
ASCII code uses 7-bit code which means 128 different characters can be encoded by assigning different numerical values including uppercase and lowercase letters, special symbols such as <,>, %,$ and punctuation marks.
ASCII codes are widely used in telecommunications, computer programming and all the areas which require storage and transfer of text data.
Since we are aware of what ASCII is, let us jump into the tutorial on How to Convert Raster to ASCII in ArcGIS Pro using step-by-step tutorial.
How to Convert Raster to ASCII in ArcGIS Pro
In this step-by-step tutorial, we will be using latest version of ArcGIS Pro 3.0 to convert Raster to ASCII.
Data
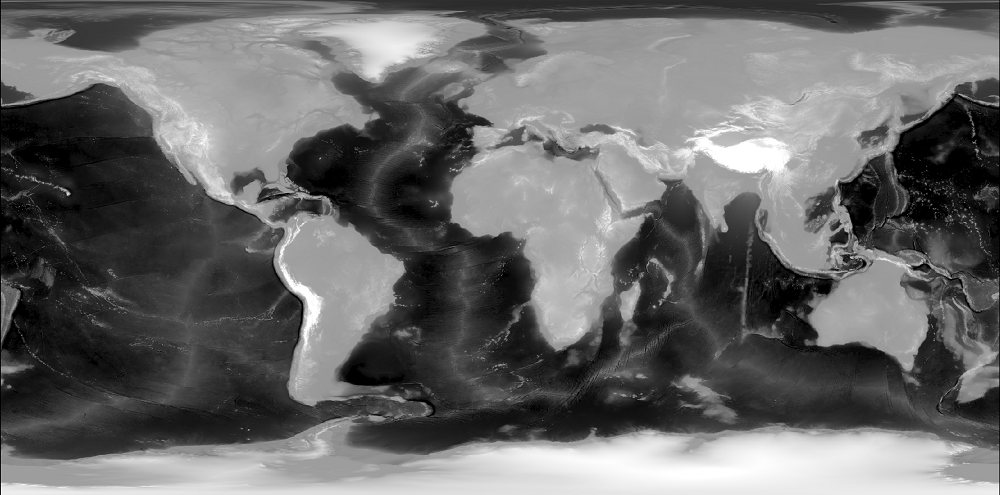
I have used bathymetric data obtained from Blue Earth Bathymetry by Tom Patterson.
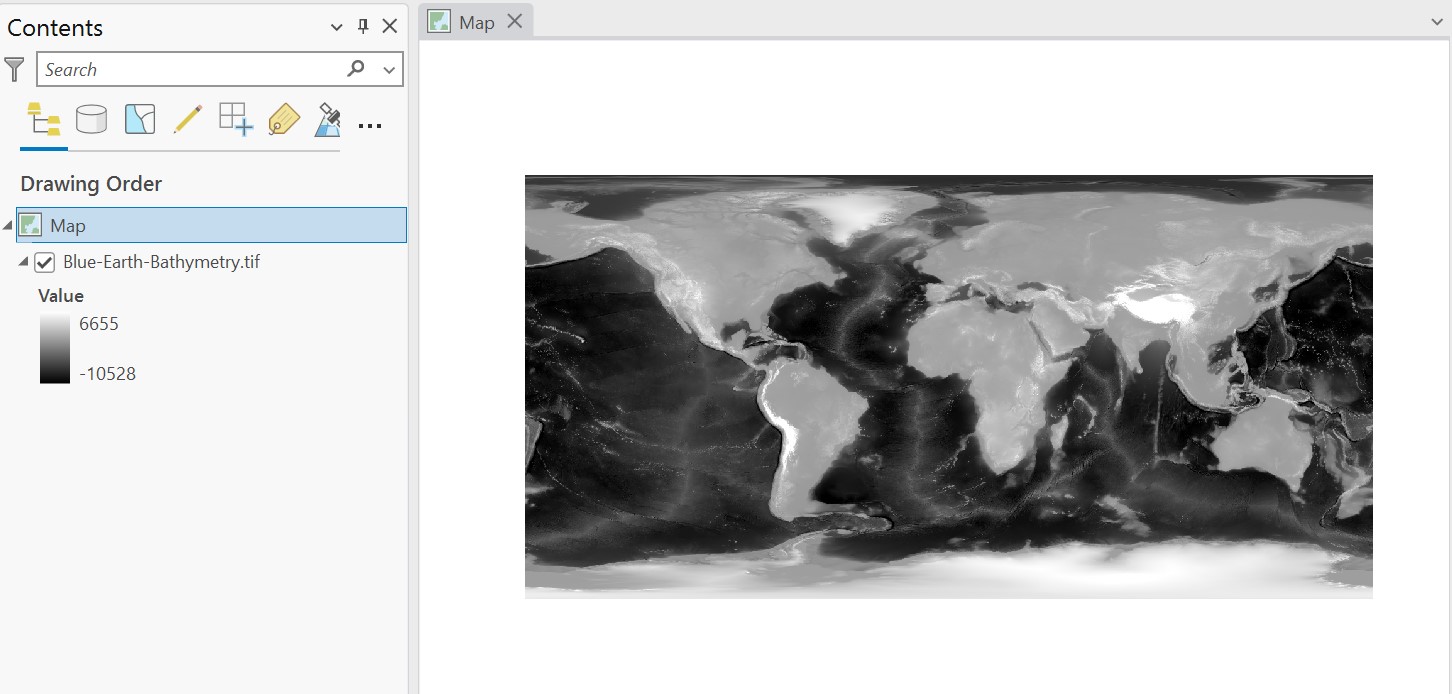
ArcGIS Pro 3.0 Environment
We can import the bathymetric data into ArcGIS Pro using Add Data option or any other method.
Resampling Raster Data
Once we add the raster data, the next step is resampling. We can do this by going to geoprocessing toolbox.
Toolbox → Data Management Tools → Raster Processing → Resample
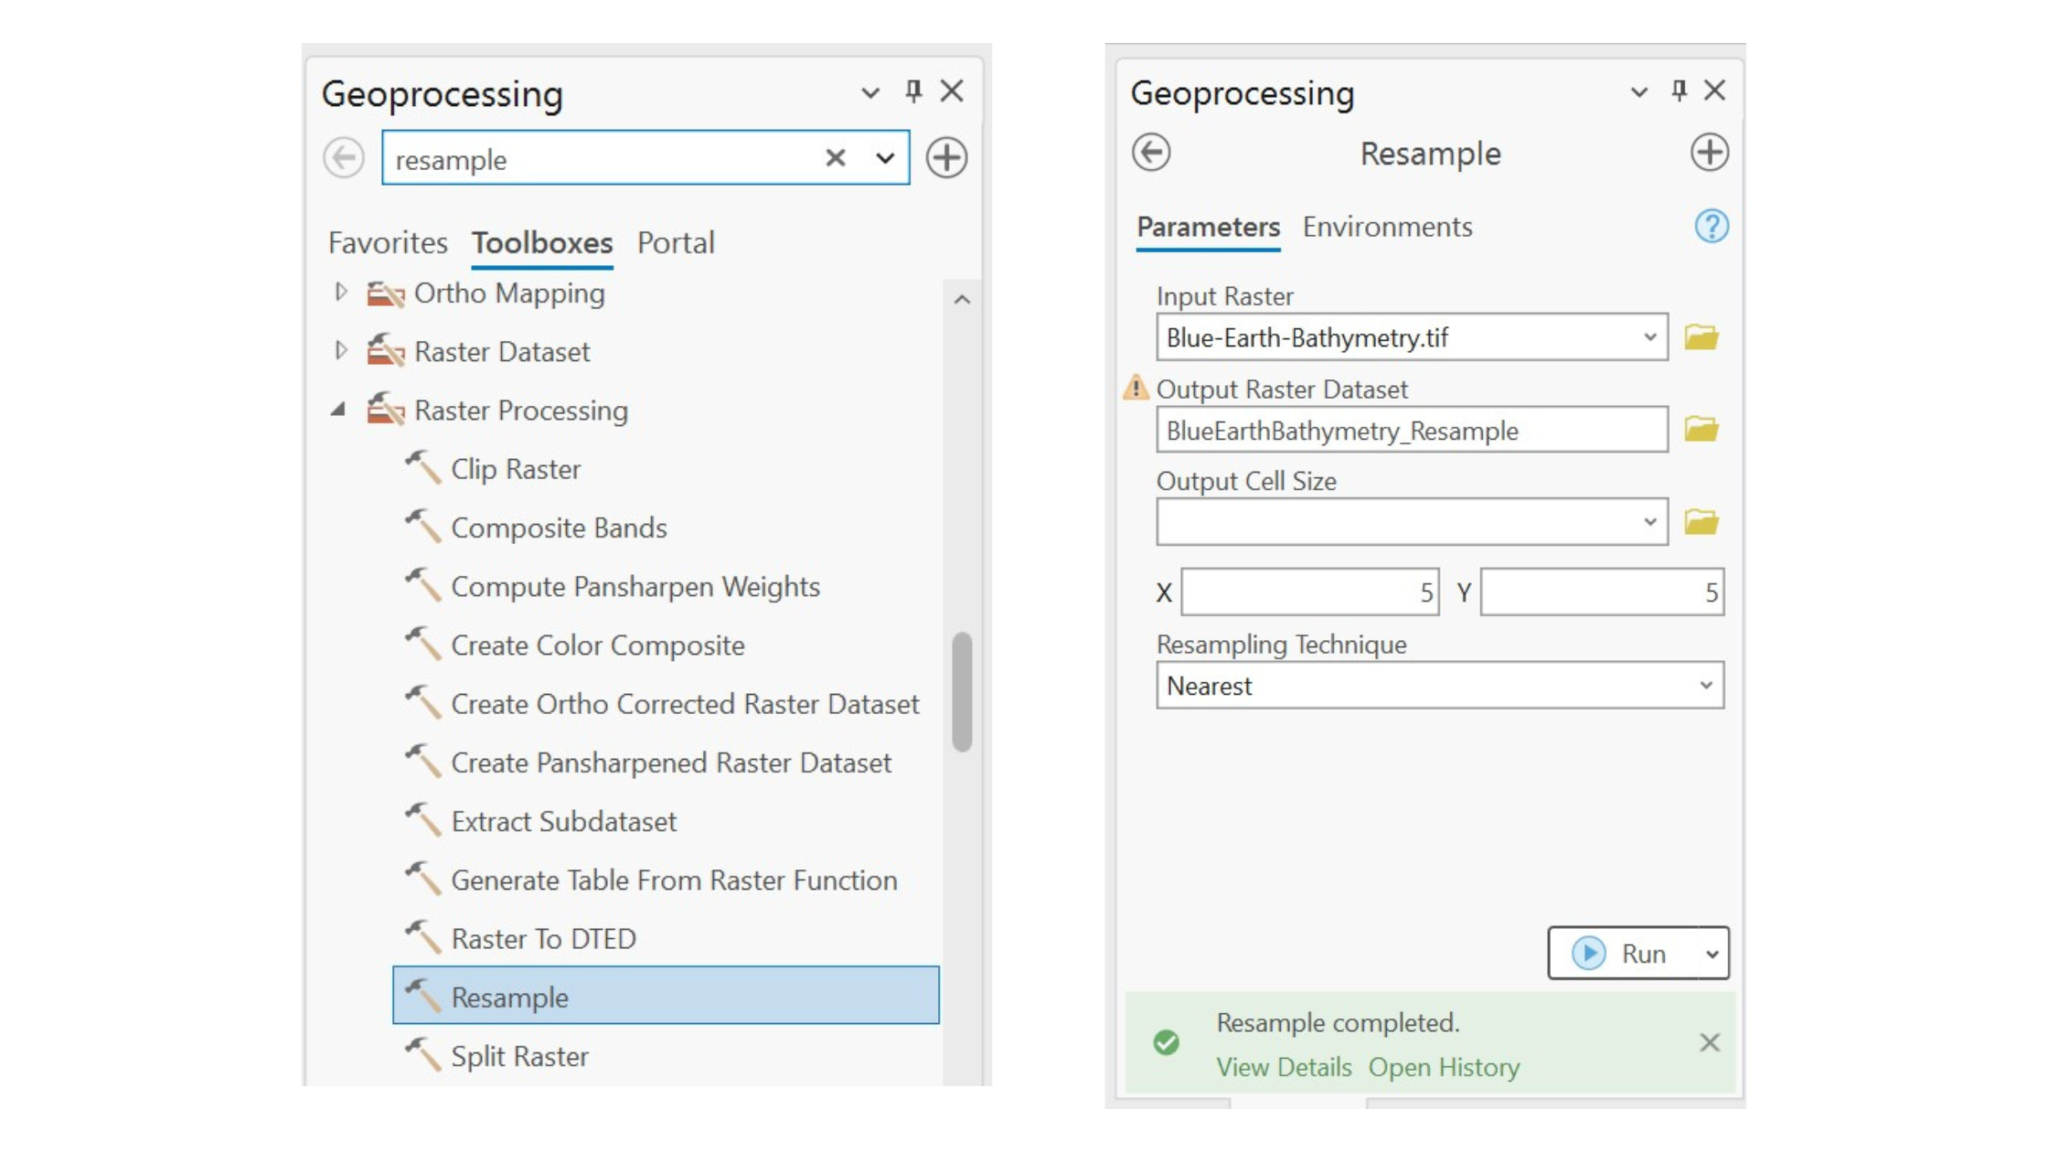
After selecting Resample, Resample dialog box will open as shown above.
Input Raster: Bathymetric data (Blue-Earth-Bathymetry.tif)
Change the Output Cell Size: X-5, Y-5
Resampling Technique – Nearest
Click on Run
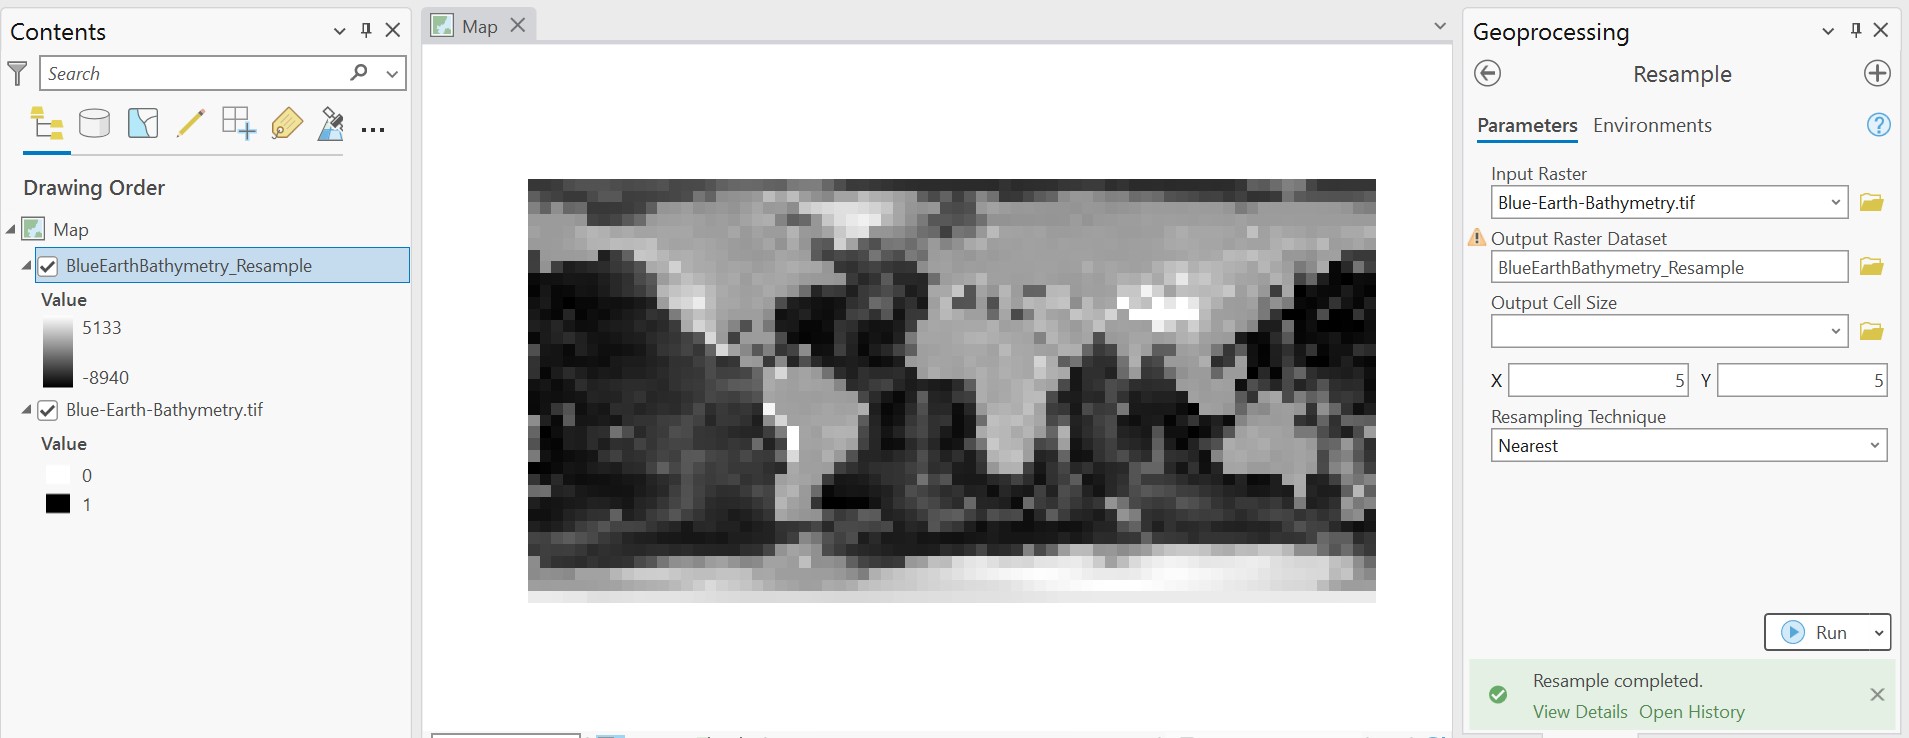
We are done with Resampling. Next step is Reclassification.
Reclassify Raster
We can reclassify the Resample Raster by going to geoprocessing toolbox.
Toolbox → Spatial Analyst Tools → Reclass → Reclassify
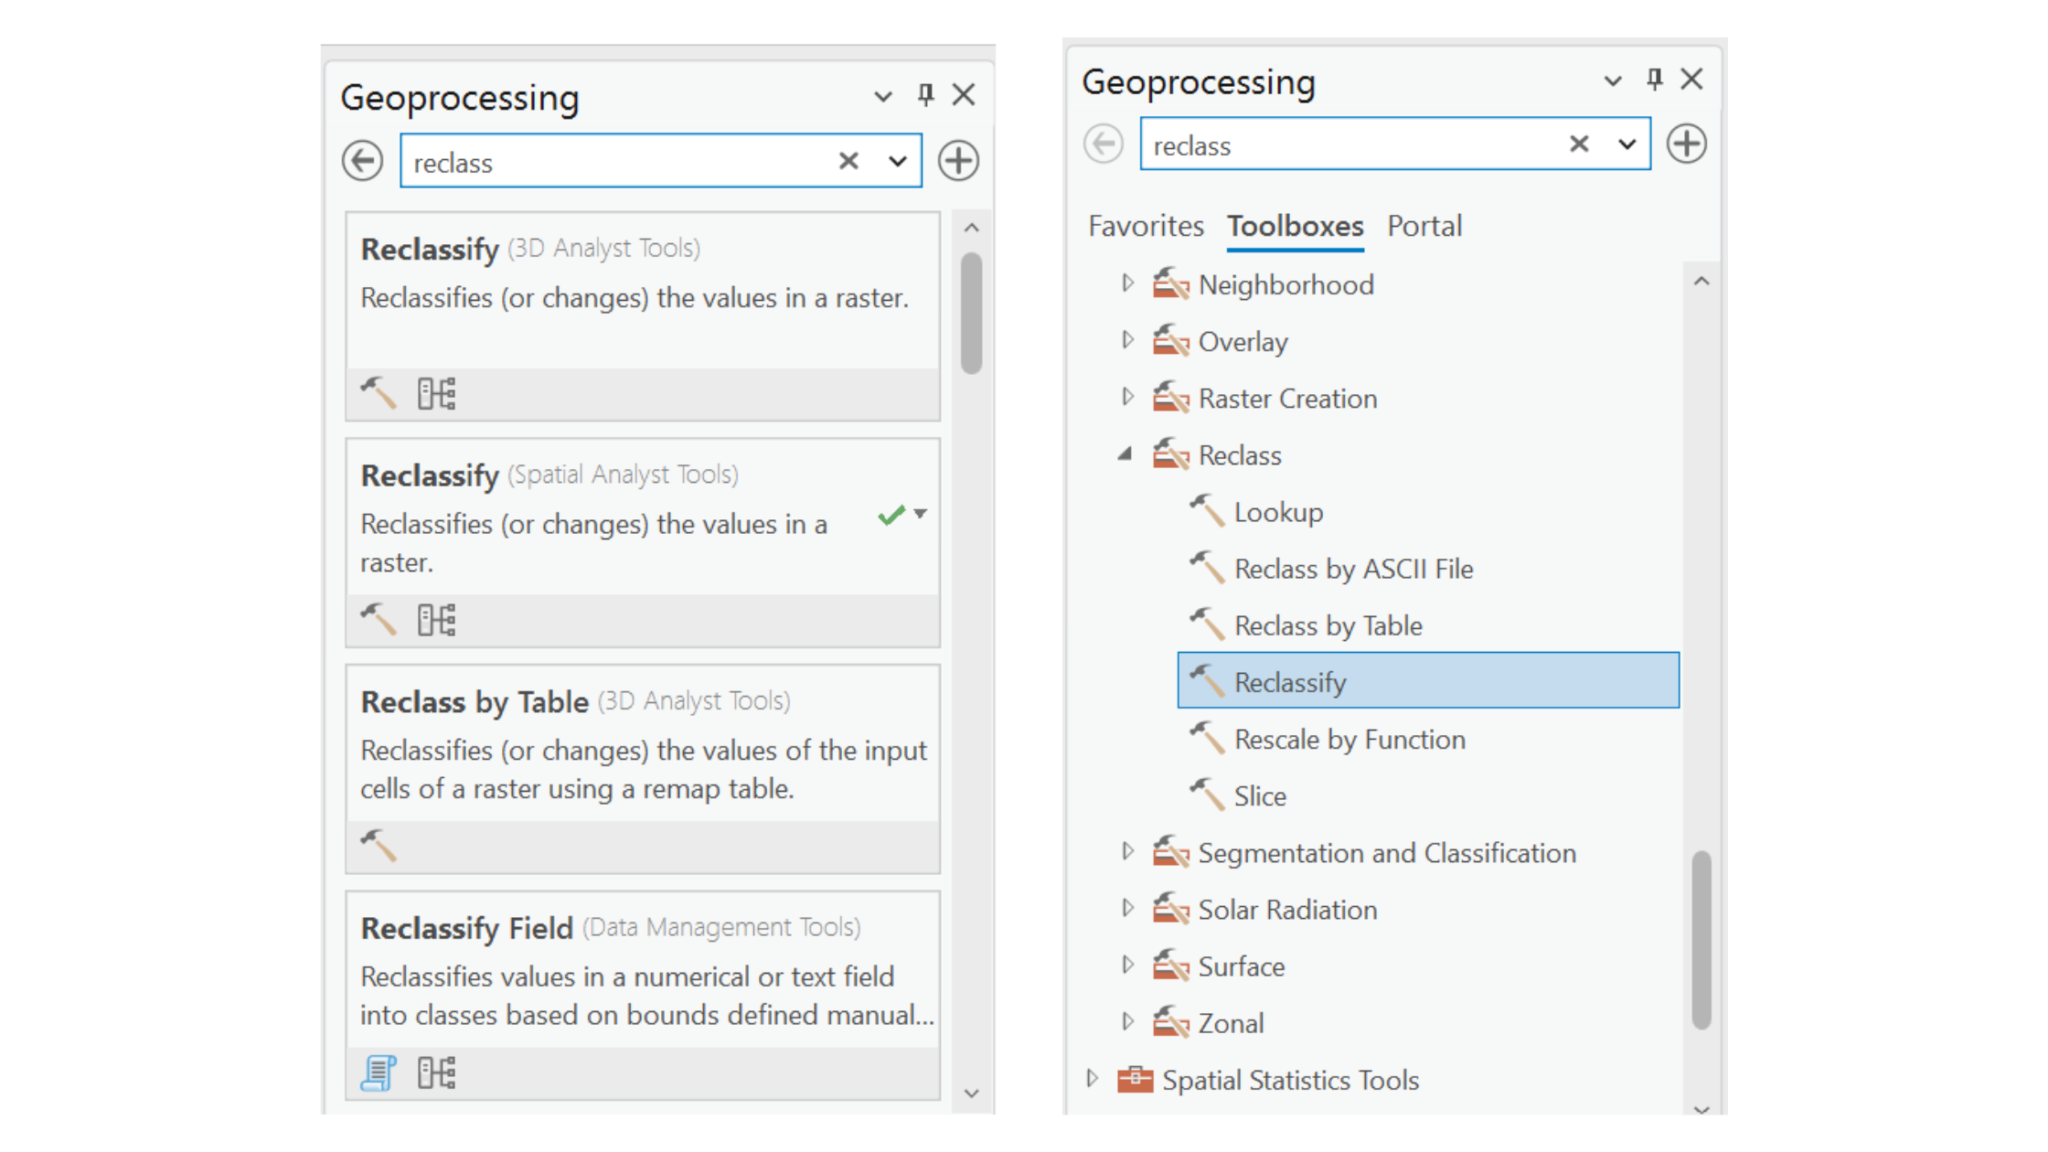
After selecting Reclassify, Reclassify dialog box will open as shown below:
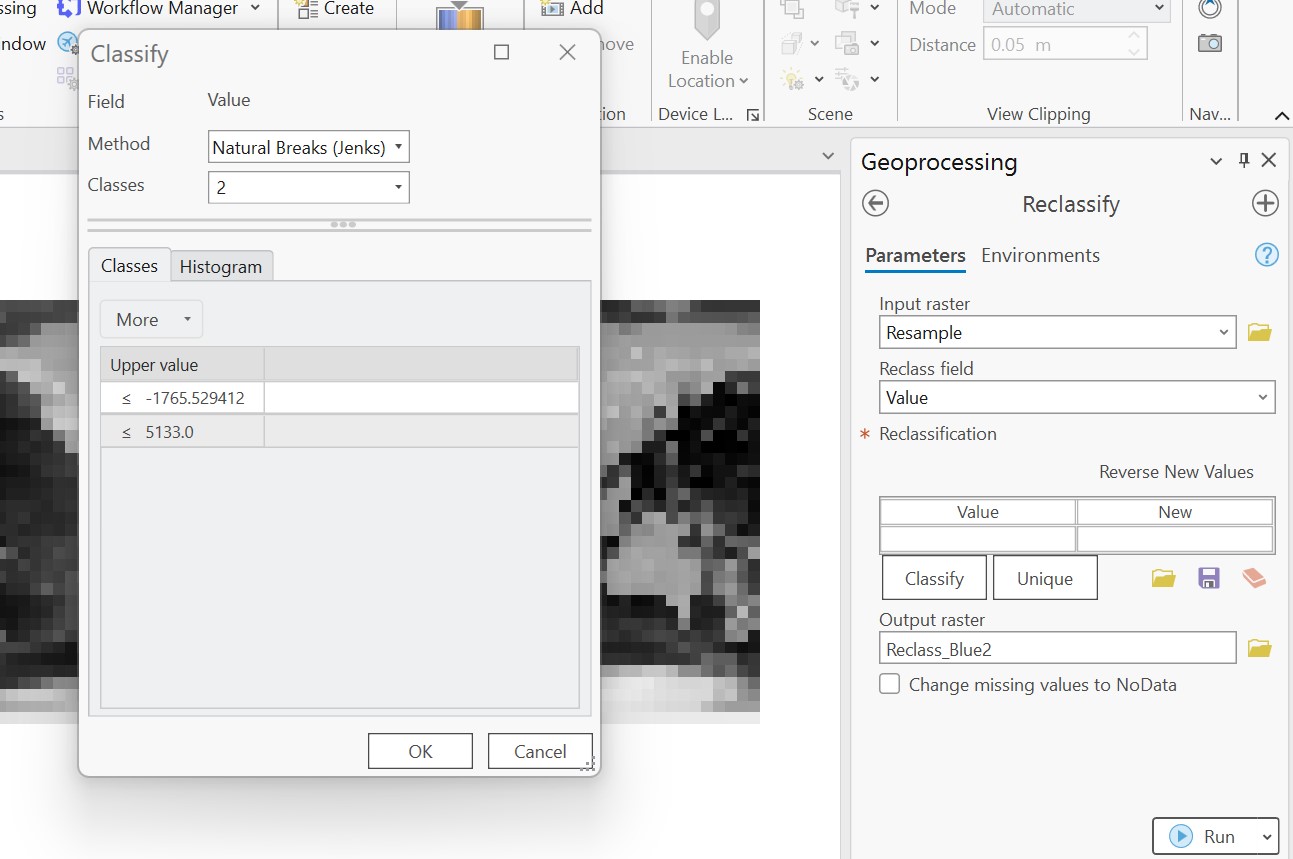
Reclassify Input Raster: Resampled Raster
Reclass field: Value
You can see two options: Classify and Unique under Reclassification.
Select Classify: New dialog box will open as shown above.
Under which select
Method: Natural Breaks (Jenks)
Classes: 2
Click OK
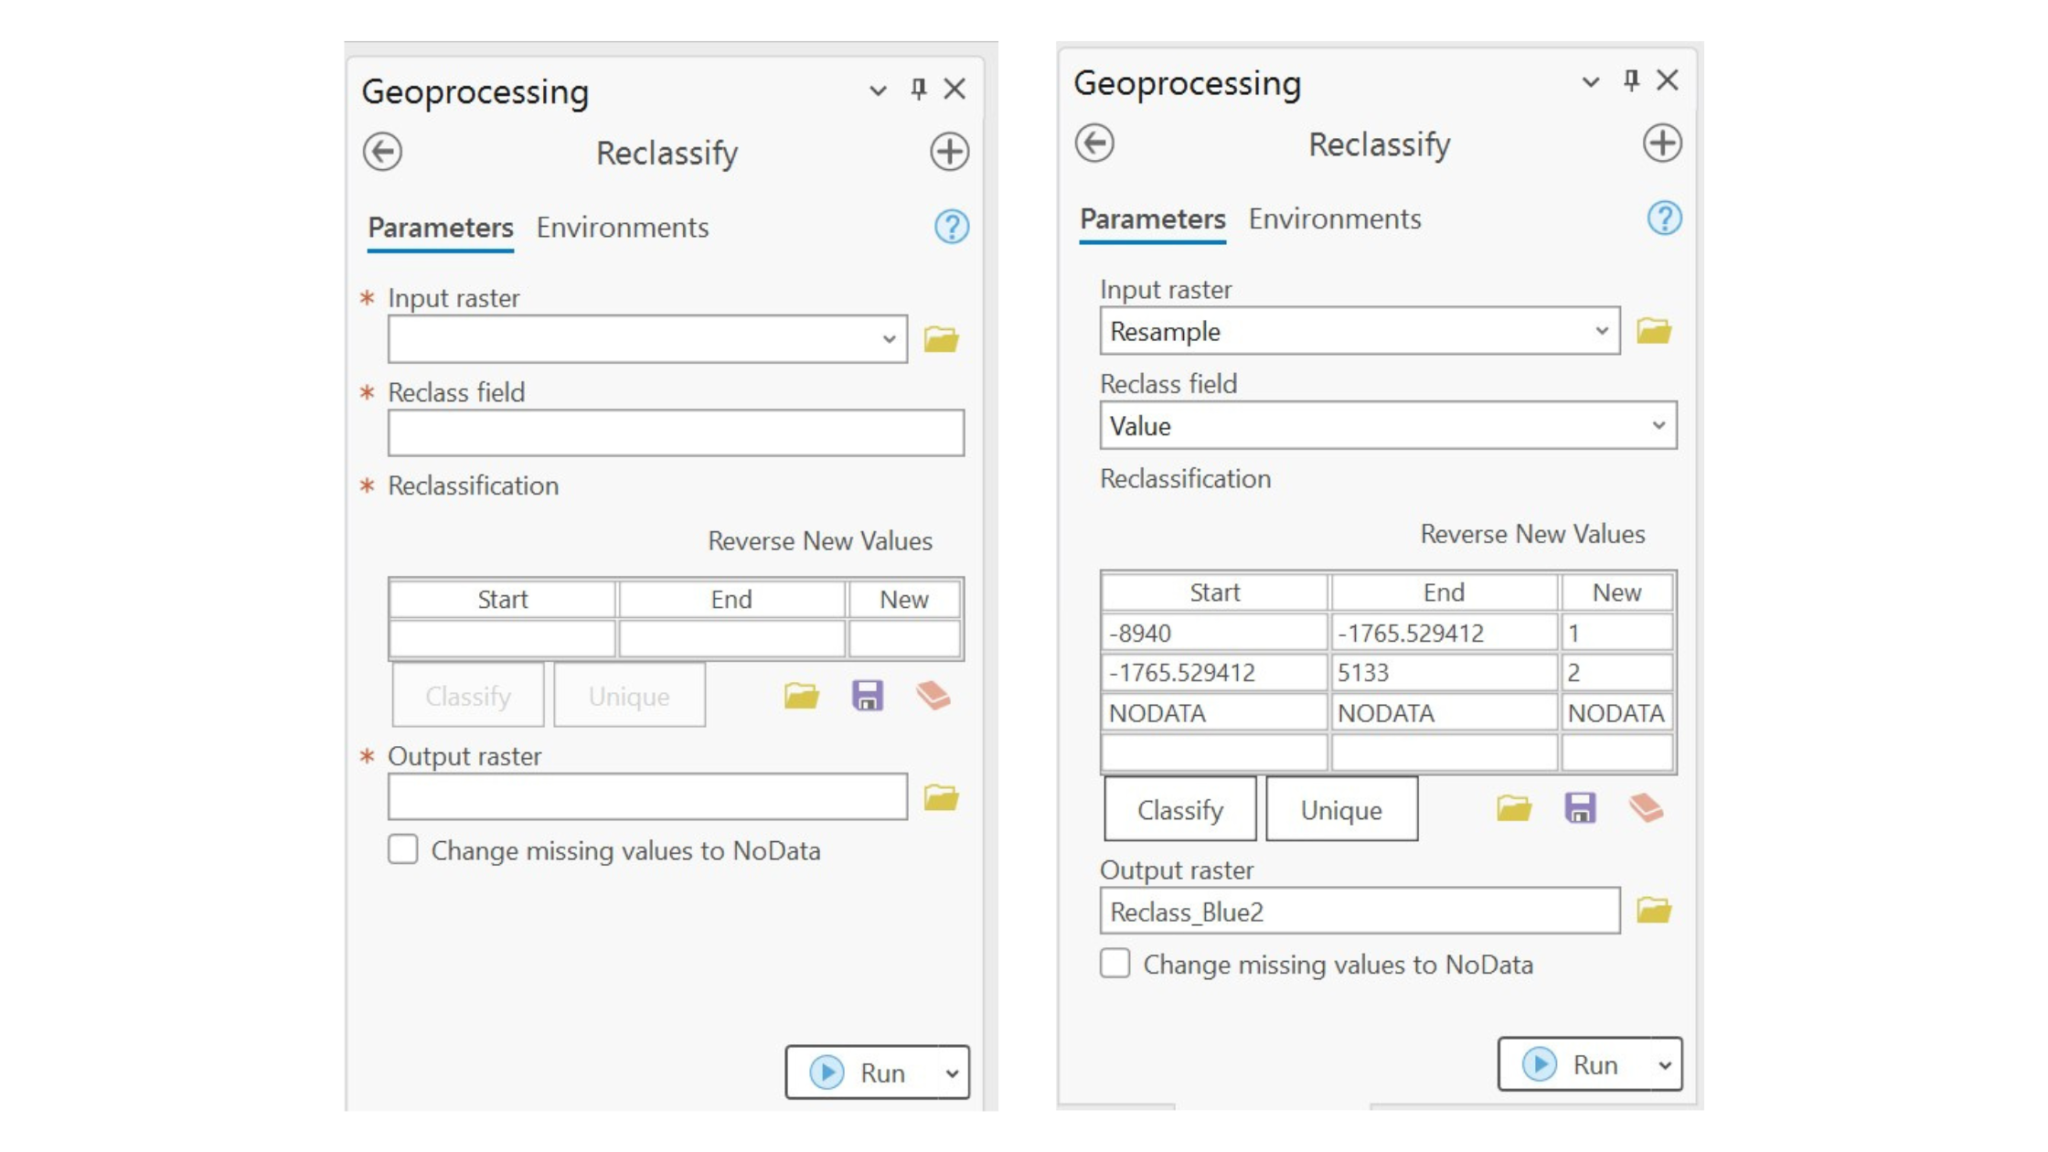
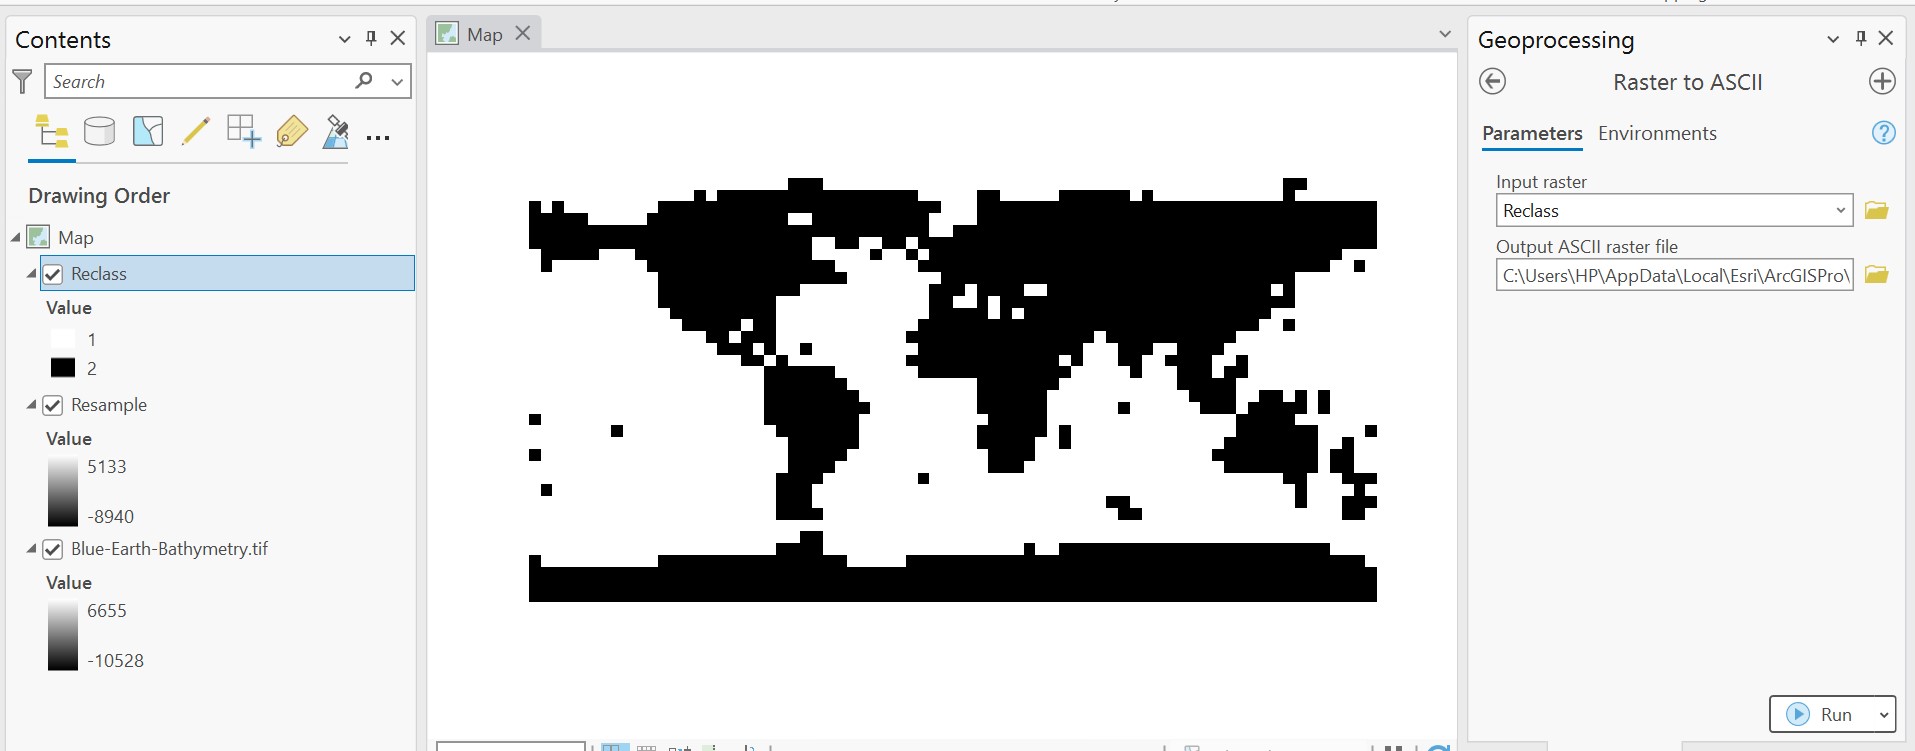
In the second dialog box, you can observe the values ranging from -8940 to 5133 have been classified into just two classes: 1 & 2. Finally click Run.
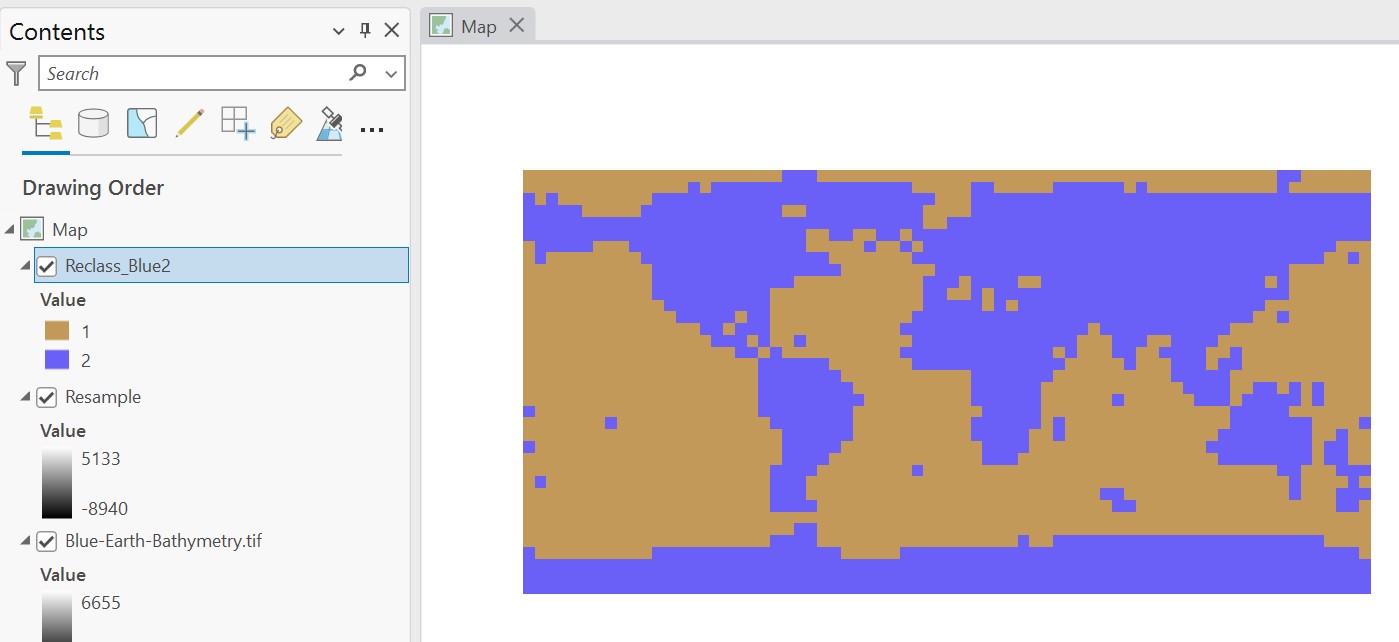
You can observe the new raster has just two classes (two colors). You can change the colors to black and white or leave it as it is (there is no change in final output).
Convert Raster to ASCII
Finally we can convert the Reclassified Raster to ASCII by using the Conversion Tools.
Toolbox → Conversion Tools → From Raster → Raster to ASCII
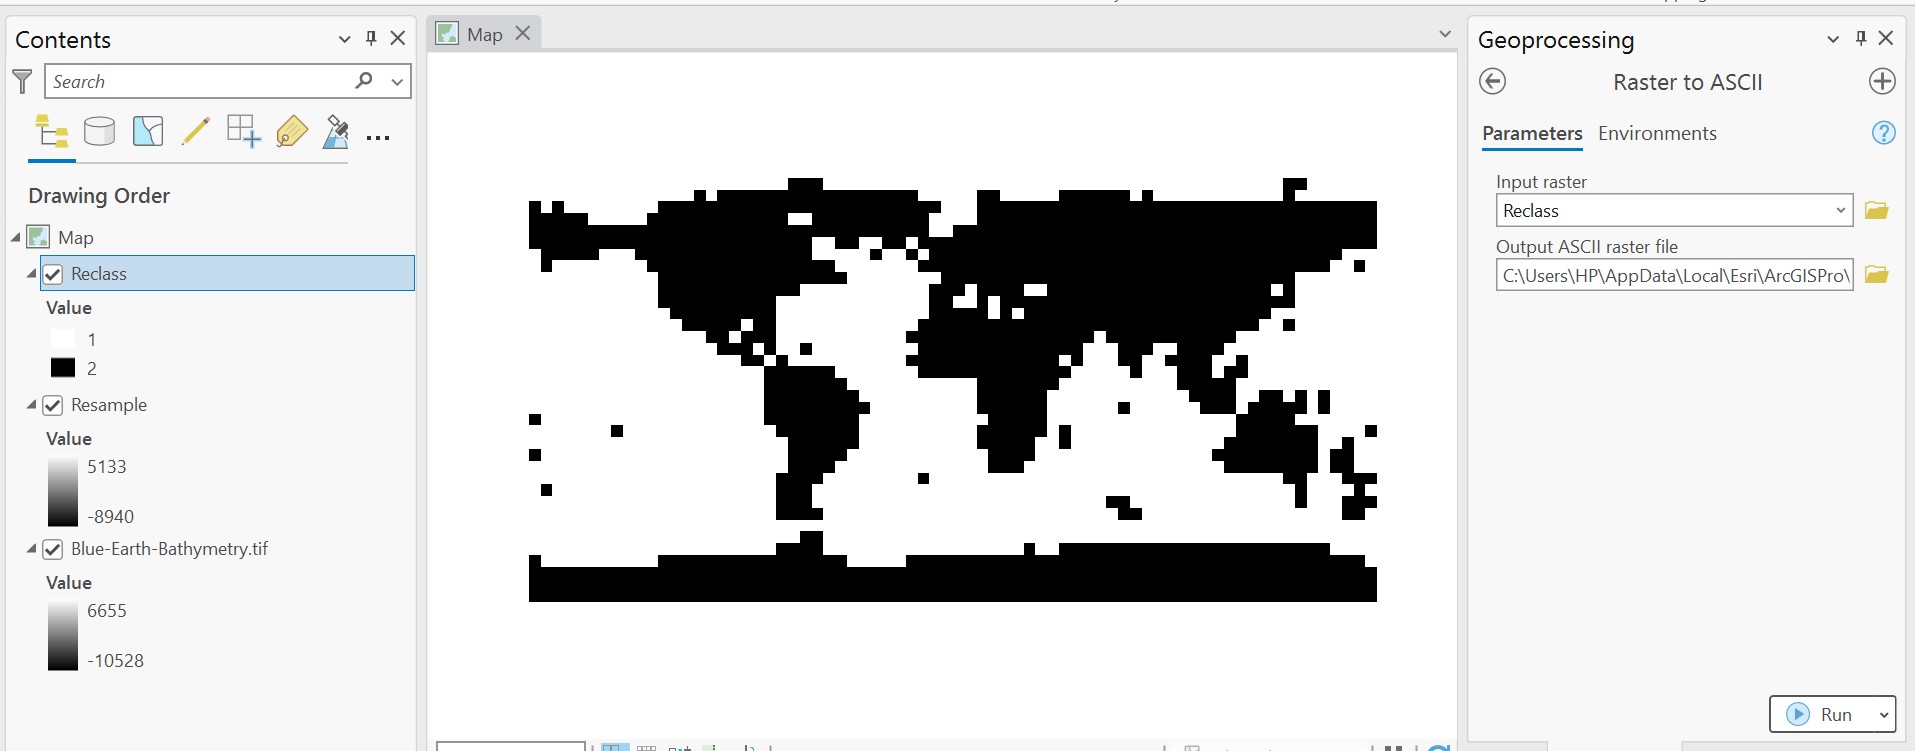
After selecting Raster to ASCII in toolbox, Raster to ASCII dialog box will open as shown above.
Input Raster: Reclassified Raster (Reclass)
Click Run
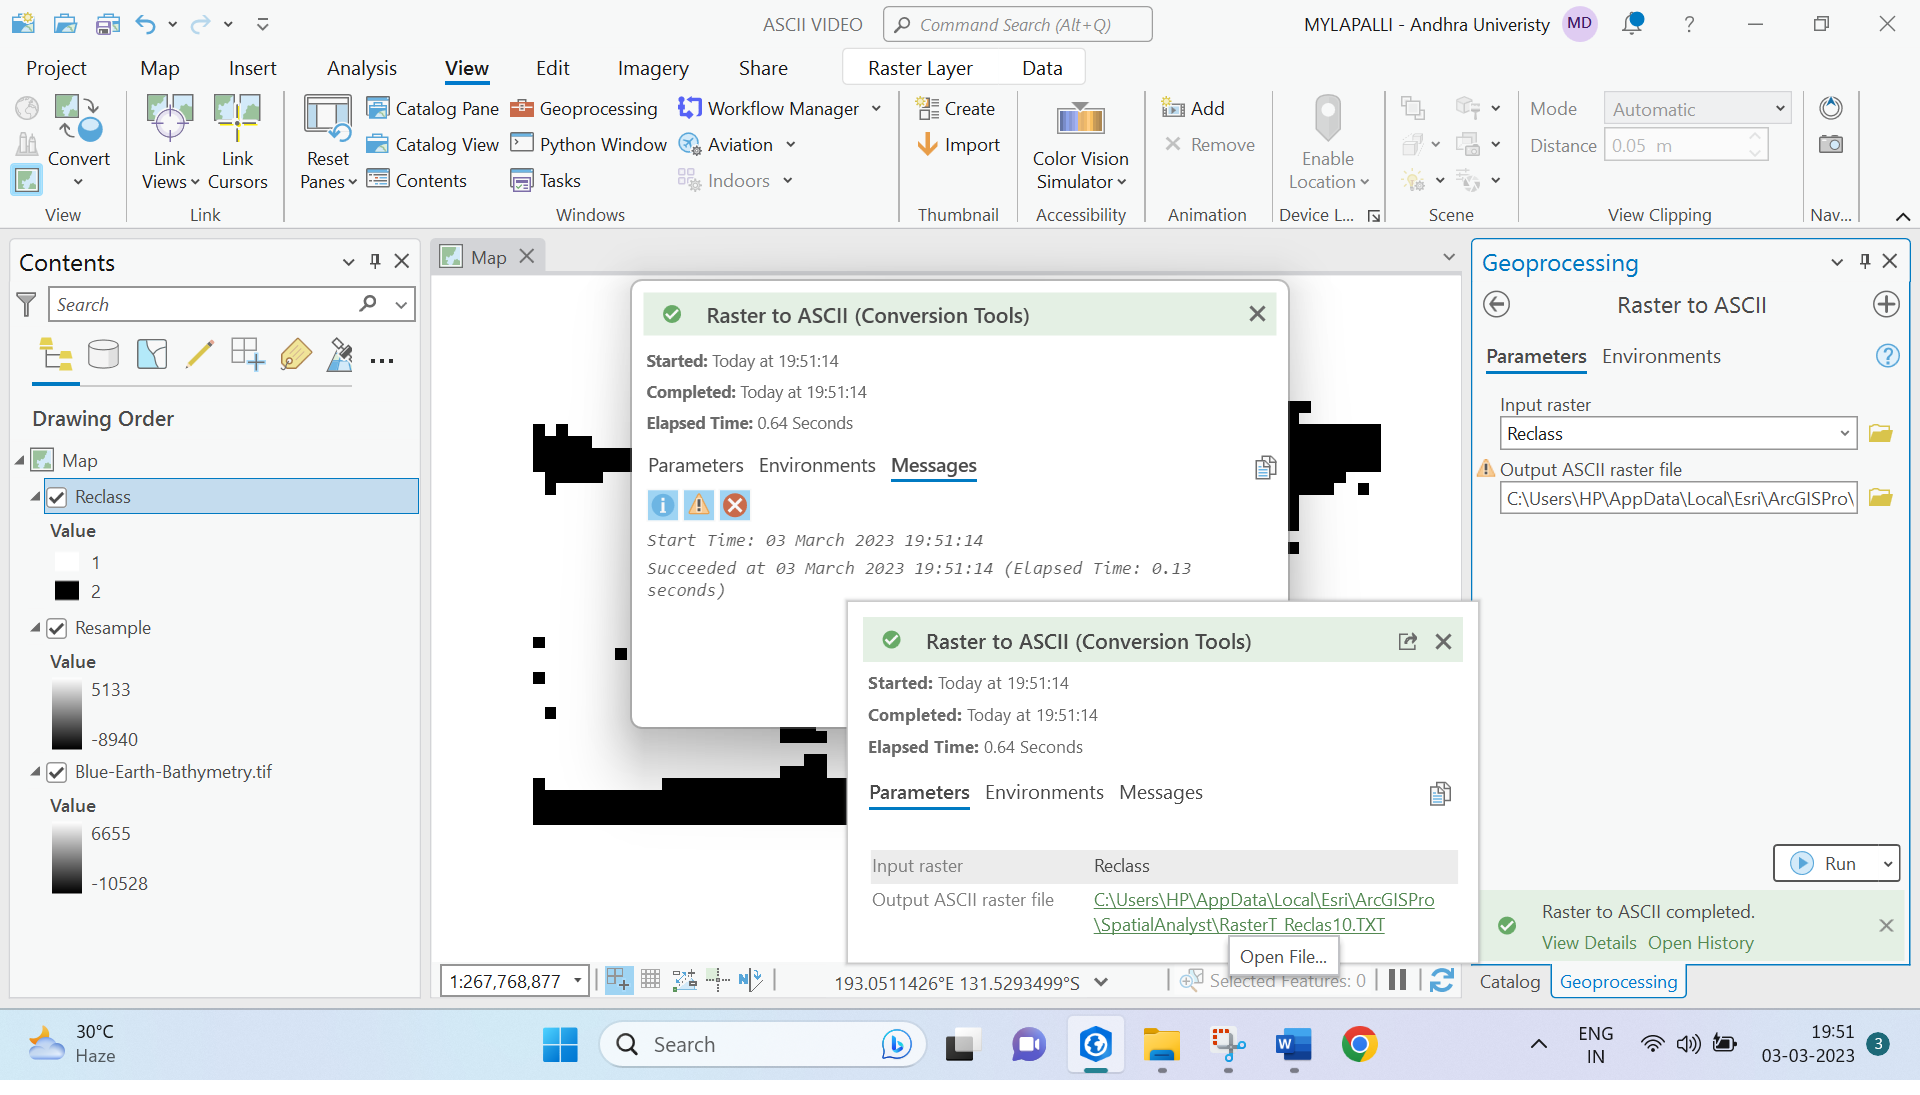
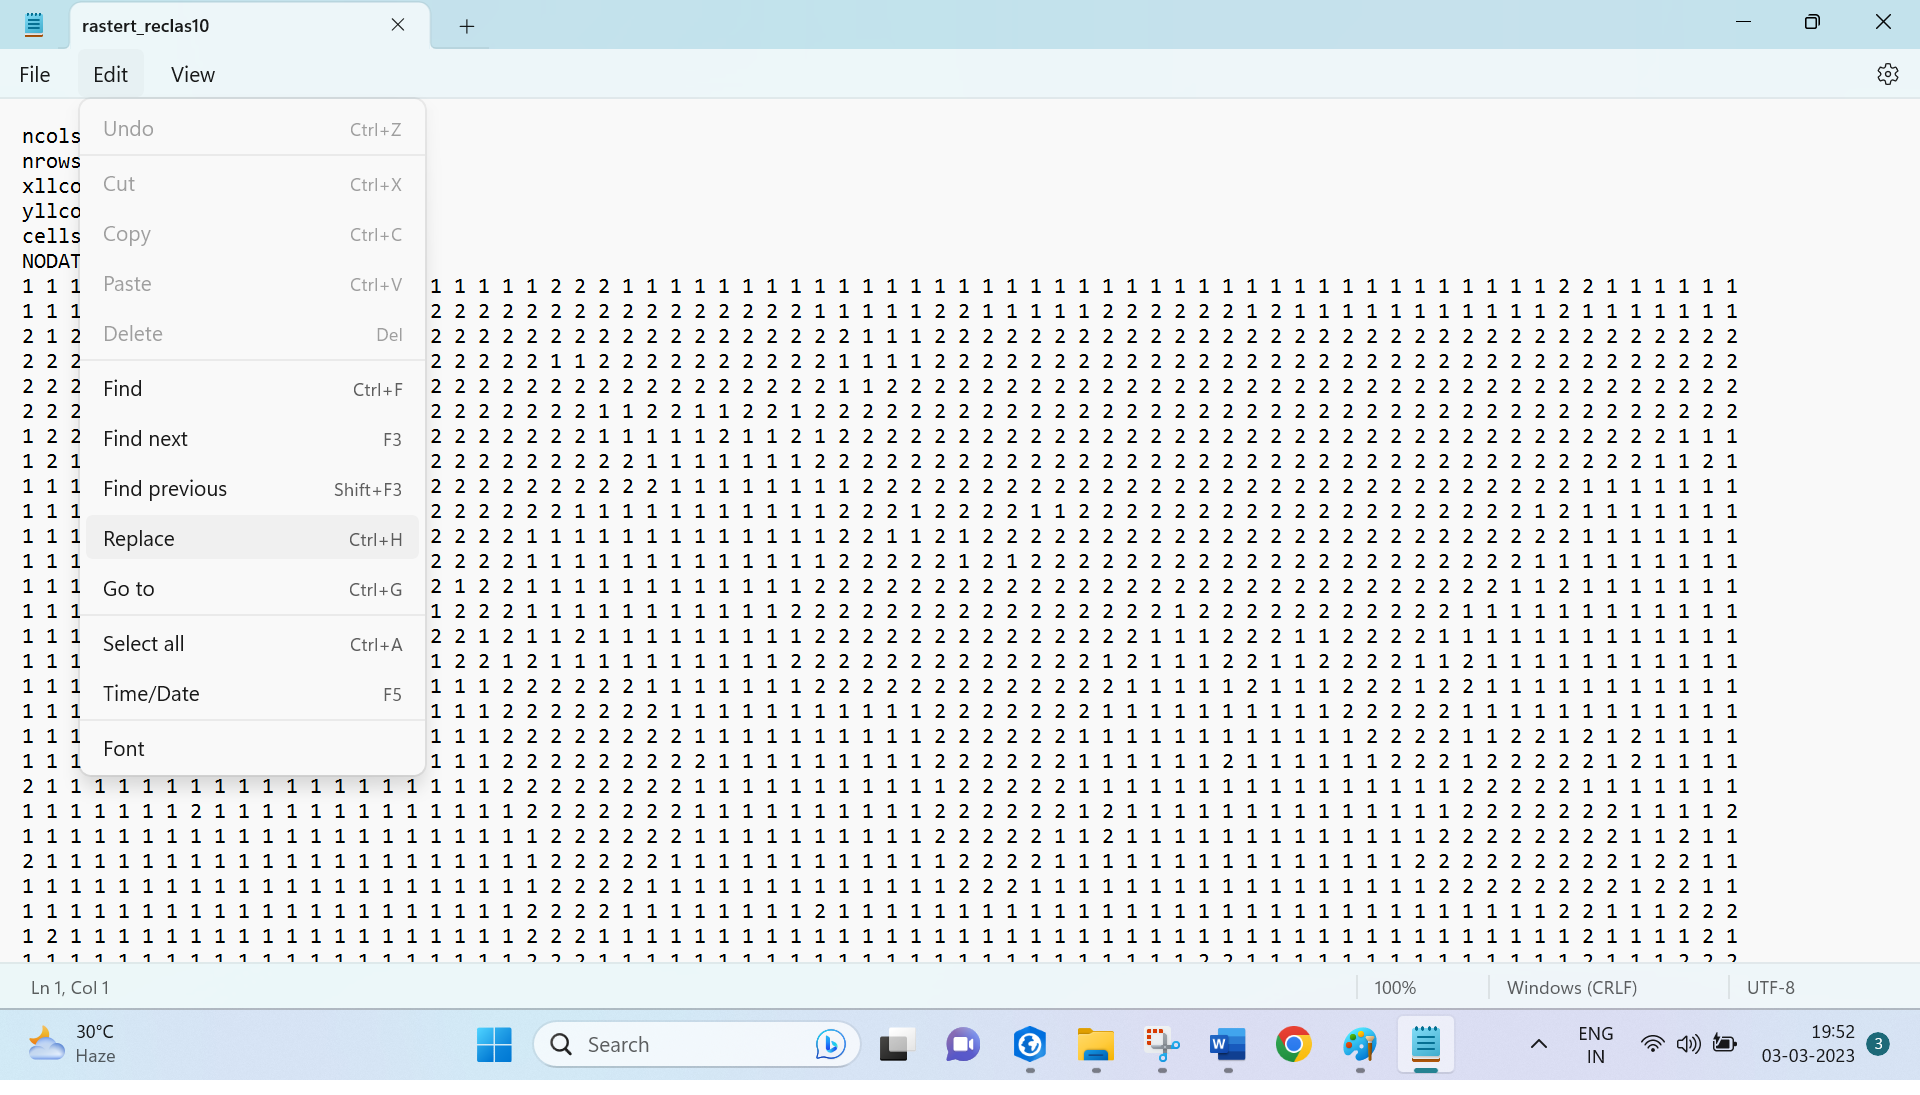
Once the process is completed, you can observe a dialog box with Output ASCII raster file. Click on the link to view the TXT file.
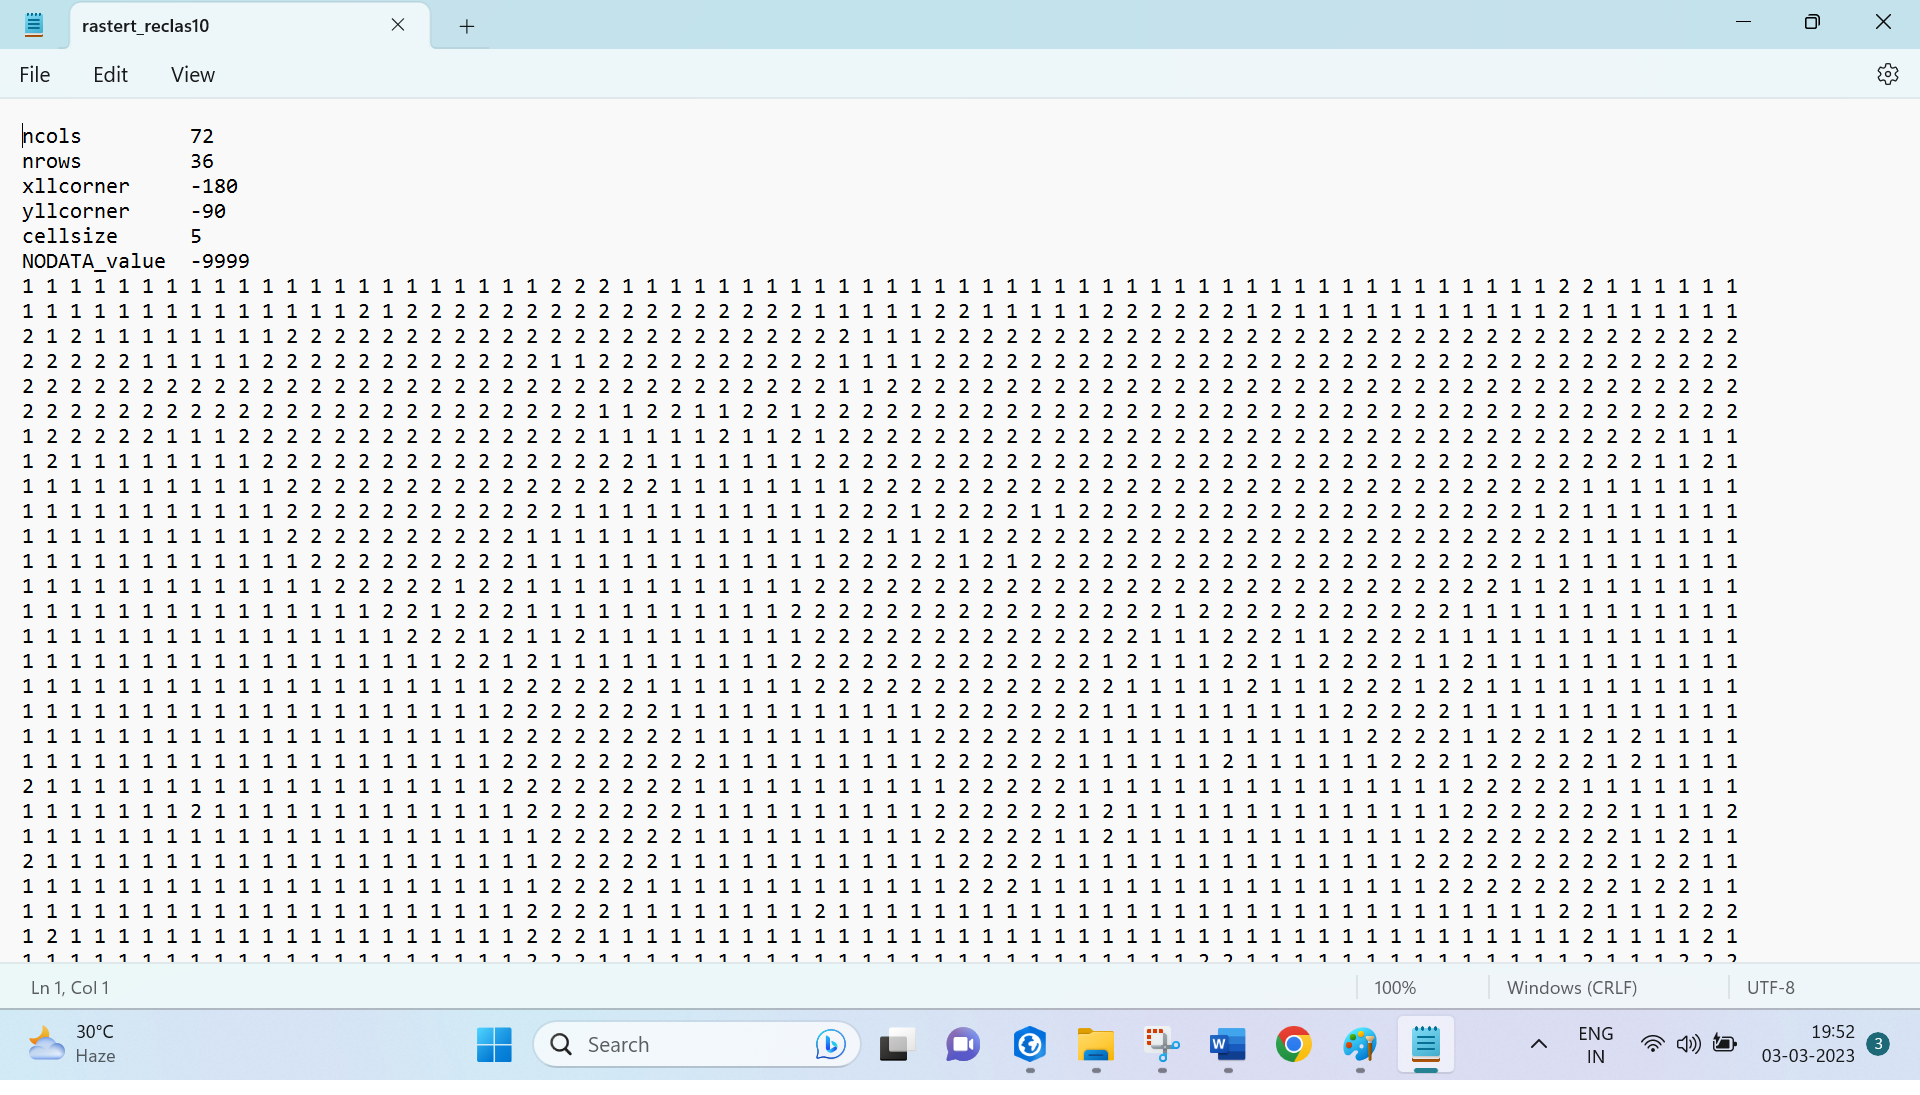
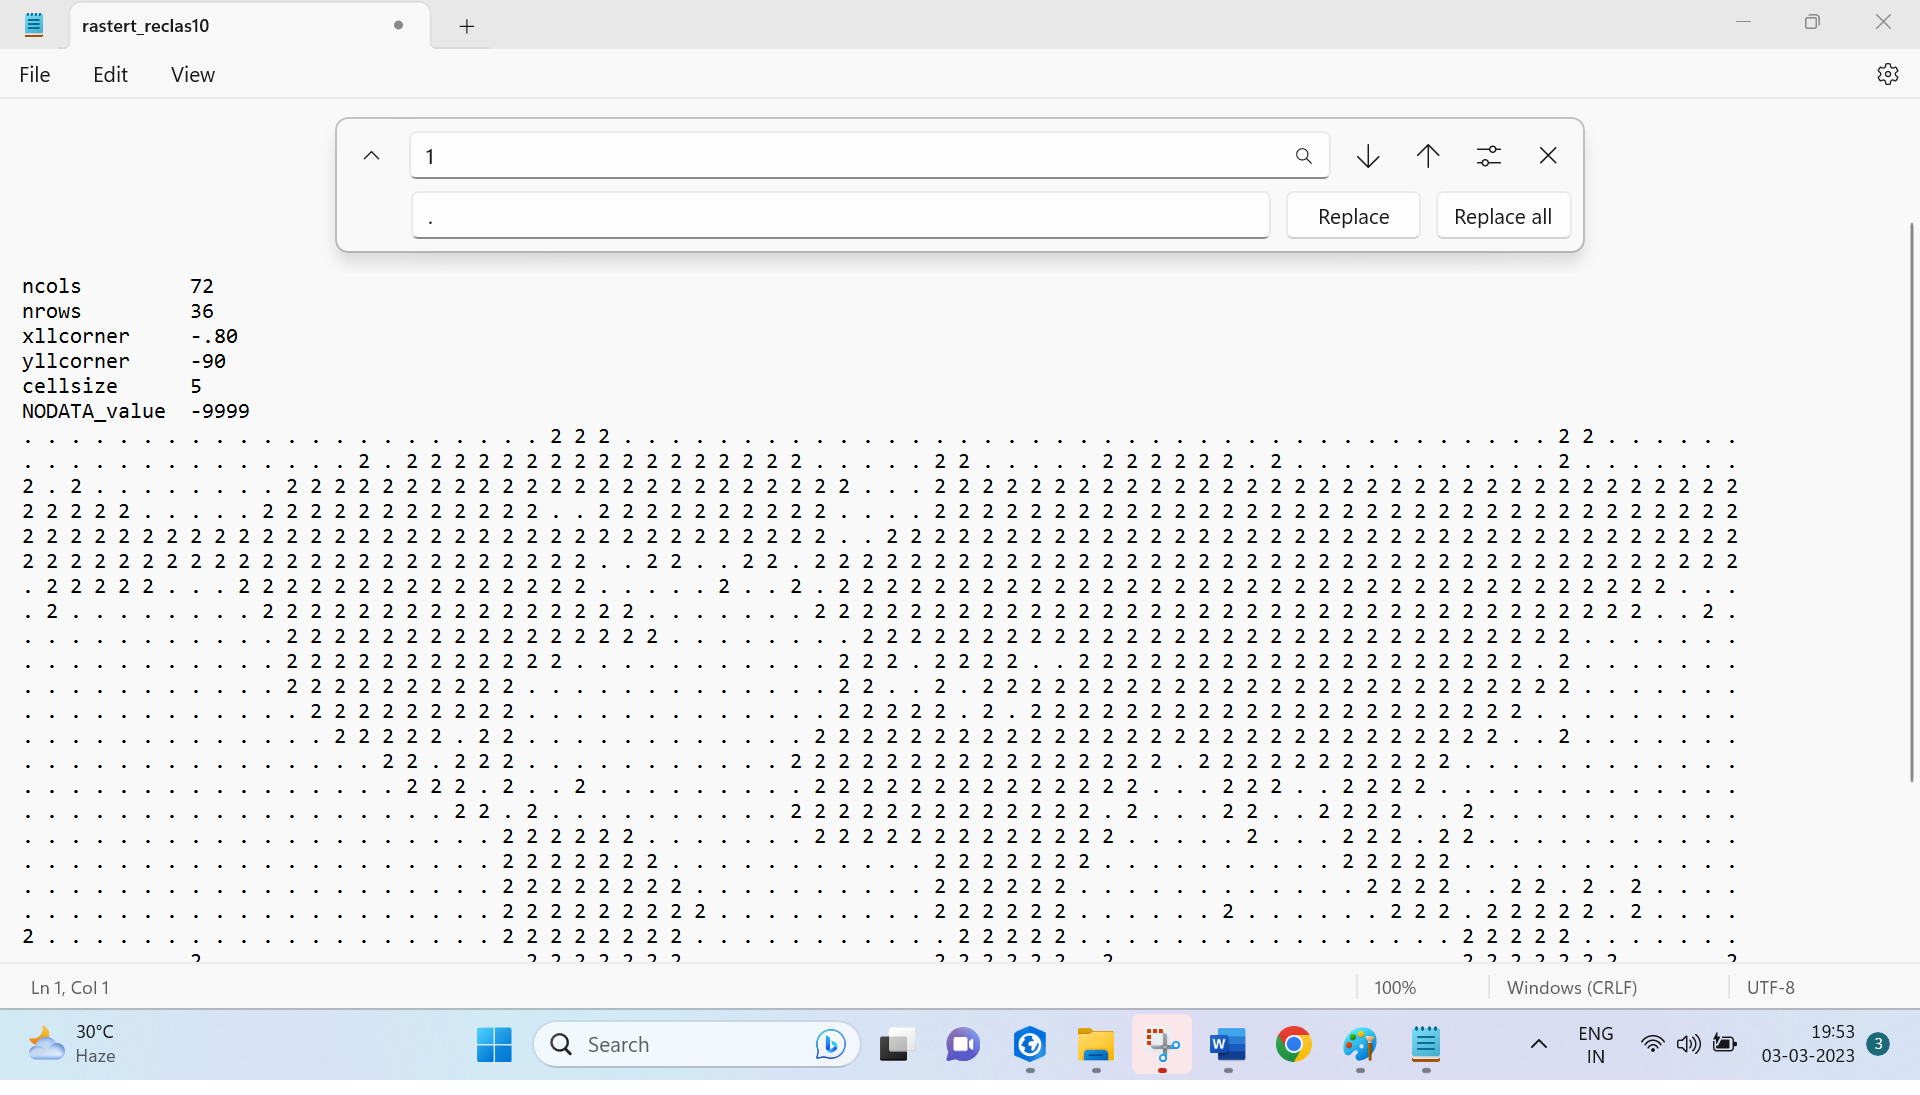
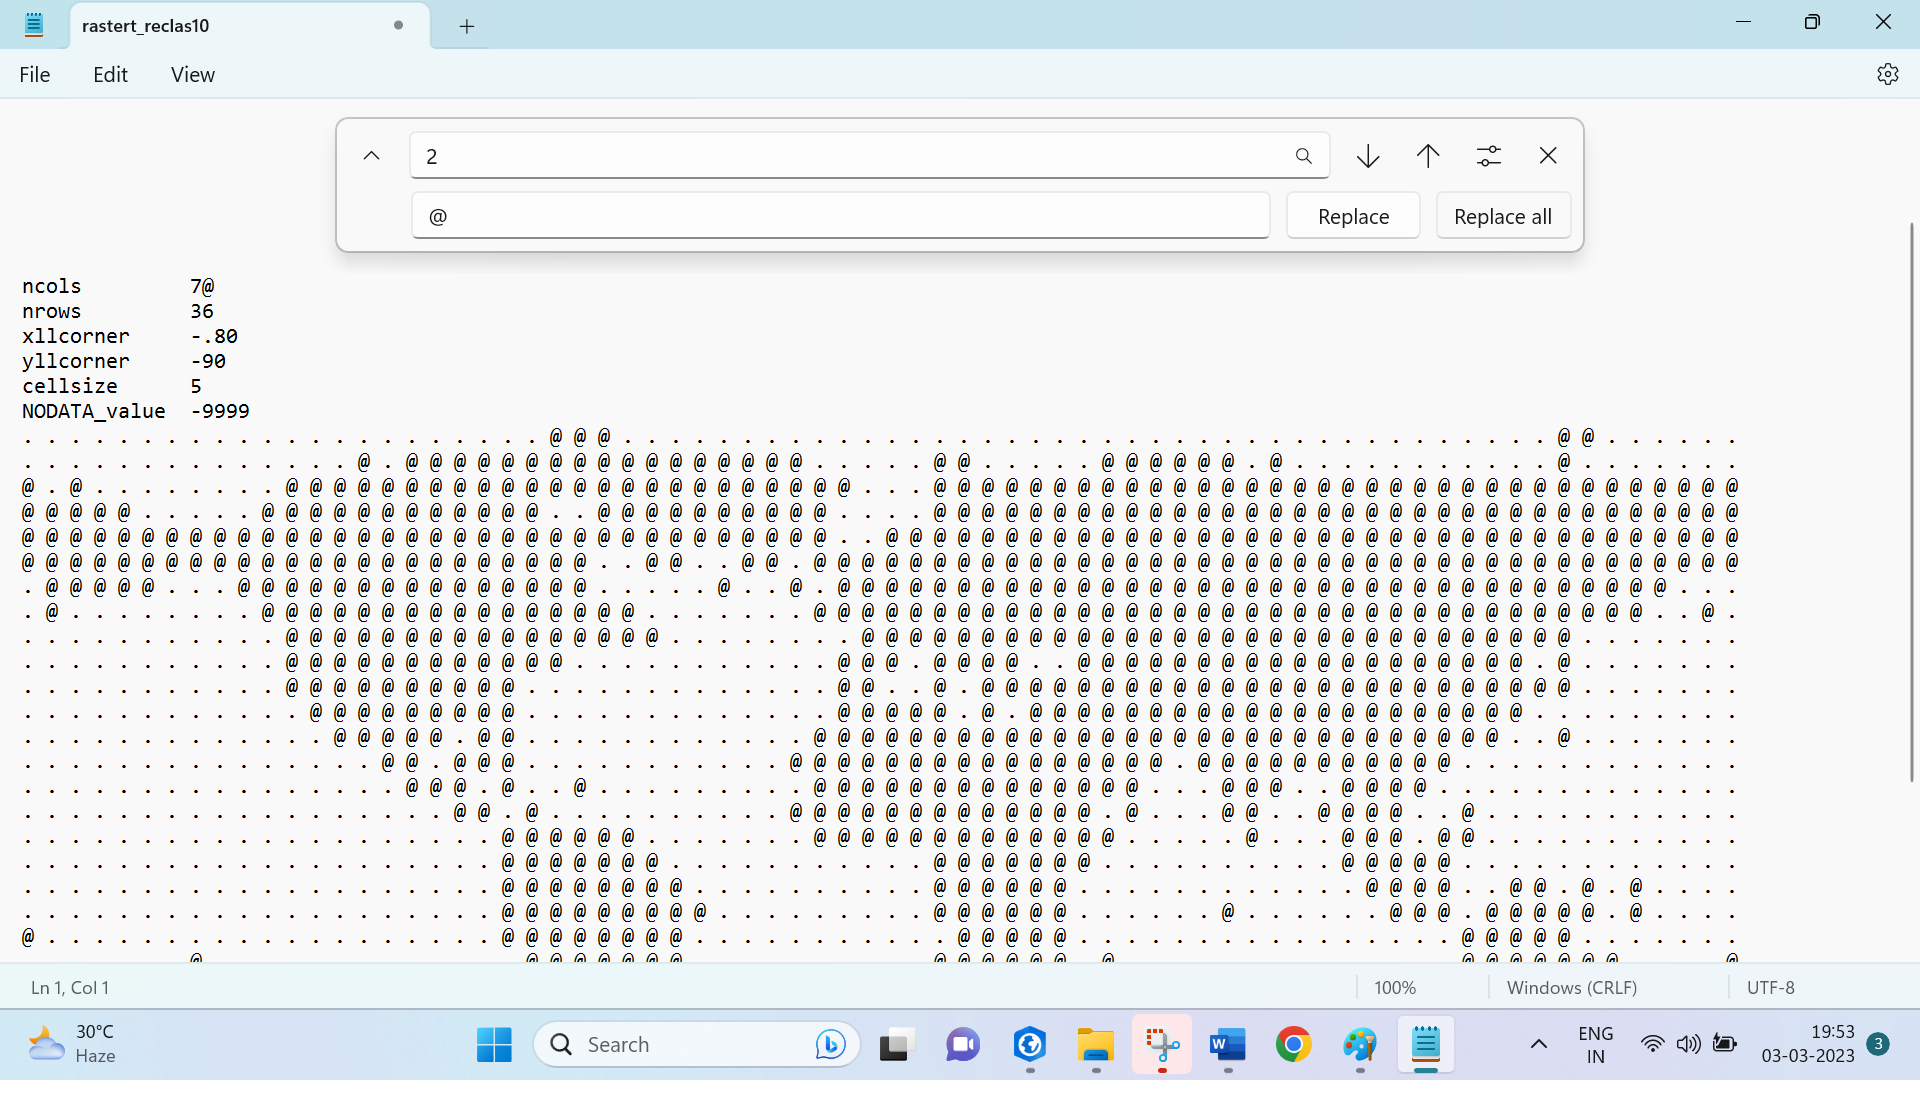
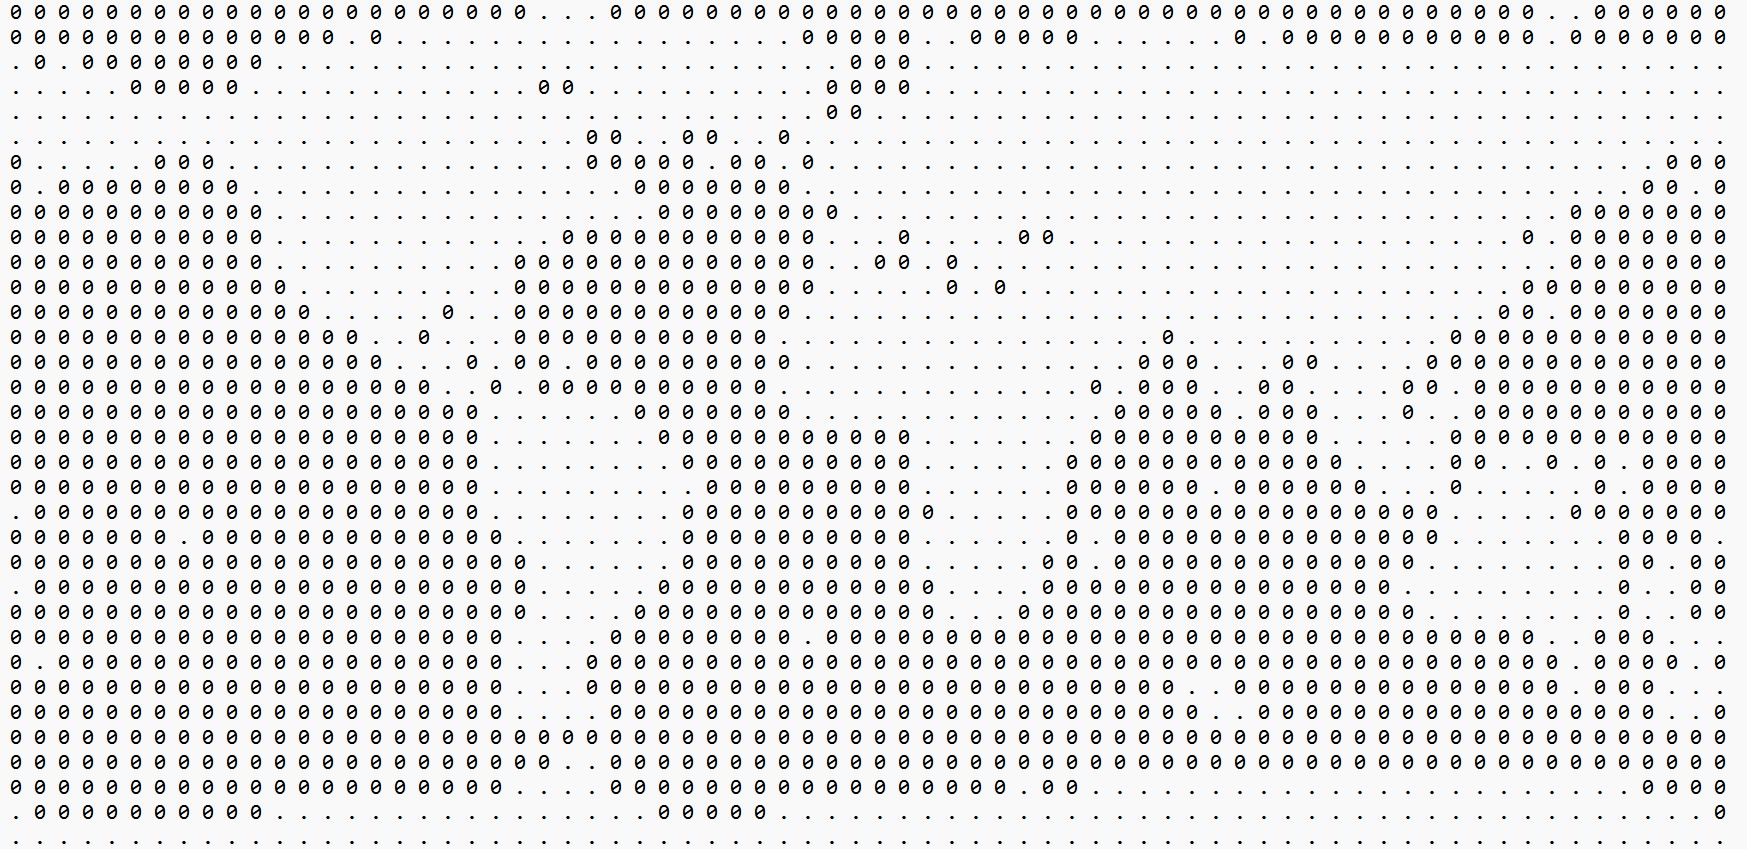
We cannot observe the world map since it is shown in 1 and 2. Replace 1 with . and 2 with @ as shown below.
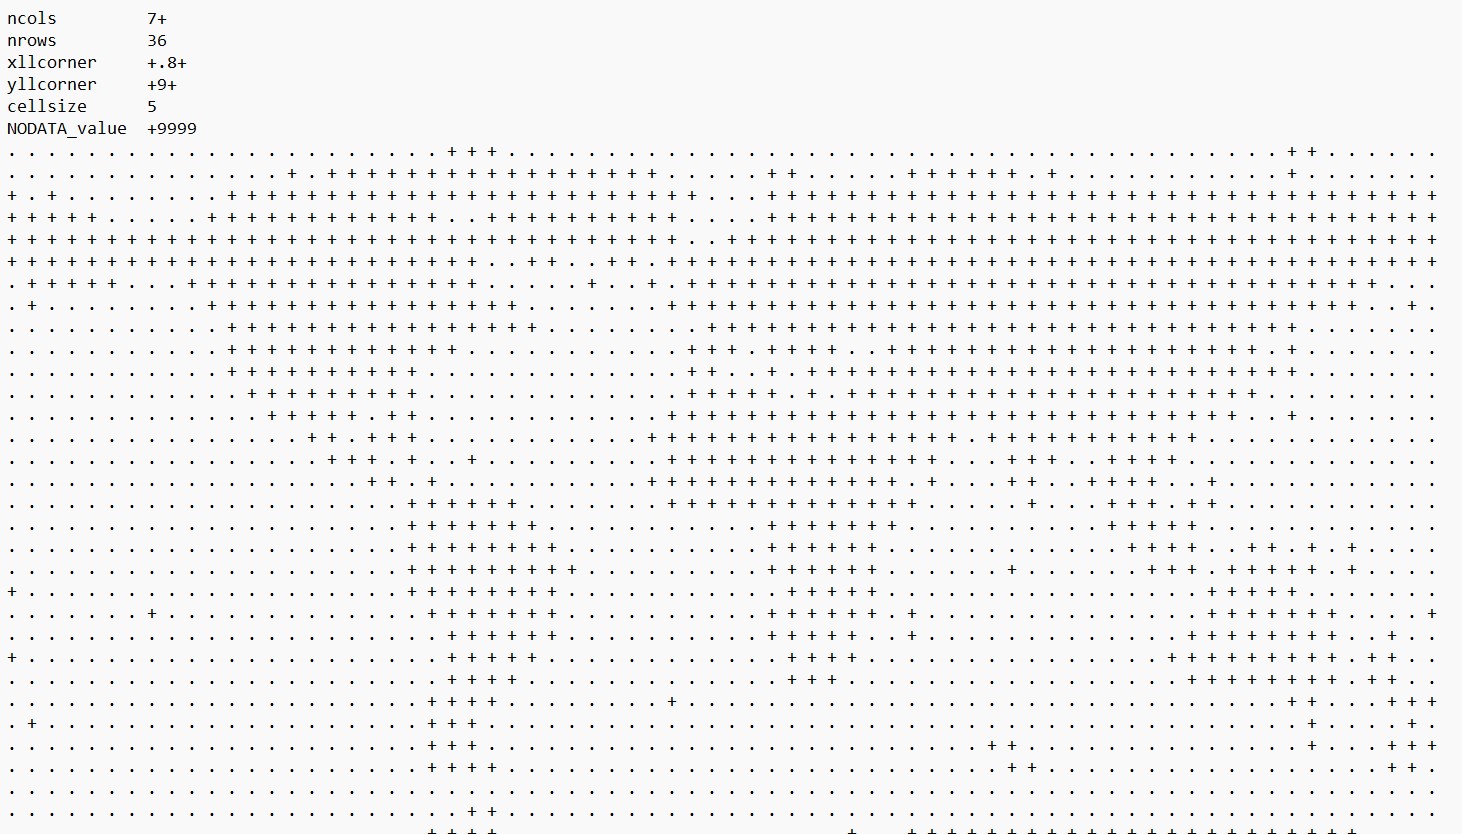
Final Outputs – Map with ASCII

You may use different ASCII codes to get different maps as shown below:

I hope you learnt How to convert Raster to ASCII in ArcGIS Pro using this Step-by-Step Tutorial.
Read more Articles
1. Read about the DAMINI APP Can Protect You from Lightning
2. Read about the How to get Weather Alerts without Internet in India

